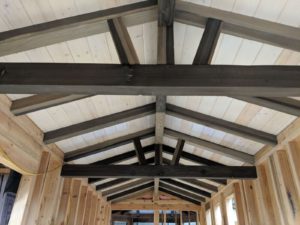
Do you like the look of aged wood? When it comes to woodworking, we are presented with a seemingly endless list of finish options. Today we’re going to focus on one of our favorites, known as “weathering” wood. This technique uses a fun bit of chemistry to achieve an all-natural, organic alternative to traditional stains. There are several methods that will accomplish the same result, but ours is the most straightforward, stress-free and affordable option.
Step 1
To begin, take equal parts white vinegar and water and add torn “super fine” (0000) steel wool. This creates iron acetate and a release of hydrogen gas, so don’t recap your solution tightly overnight!
Step 2
Allow the solution to rest for 2 hours. The trick is, you may need to artificially increase the tannin depending on the wood type. Oak will darken naturally, but other woods (such as pine and fir) lack these natural tannin and will need a boost. Just add a couple bags of black tea, and voila! Science.
Step 3
Sand your board to the desired grit. We personally recommend the Diablo Orbital Sander sanding nets for a few reasons.
1) We’ve found them to be more durable.
2) They leave less “swirlies” in the grain than traditional sanding discs.
3) They create a more rustic feel at an 80 grit, as opposed to a more polished 220 grit.
Step 4
Brush on the solution in long strokes, minding the drips as you go. We recommend finishing the first three sides initially, and then waiting a day to allow them to dry completely. After 24 hours, finish the final side and use a towel to catch any over-spill. The chemical reaction provides instant gratification in minutes, but the real satisfaction comes the following day when the project’s true glory is revealed.
Step 5
Wait one full day after completion. If the material hasn’t reached the desired darkness, gently use a sanding pad to hit the raised grain and follow up with a second, third or fourth coat. It won’t continue to get much darker after layer #4. If you’d like the same tone with more color variation, try doing a few at each level and placing in an intentionally random pattern.
You may smell like a pickle, but you will feel like a wizard! You can seal the final product with polyurethane once it’s dried, or leave the natural aesthetic as desired. Good luck minions!


We’re pleased to bring you this guest blog by our finish and trim expert, Shana Hirst.