Tiny SMART House Blog

Permaculture- Old Tech with Modern Materials

Intro to permaculture

Everyone has heard the term “Permaculture.” But what is it? The short answer is that it is the utilization of local resources to benefit the local community. Semantics aside, it’s the philosophy of making do with what you have on hand. When there is a surplus, it is redistributed for the greatest benefit to the land and people. Everything has connections that can be utilized. For me permaculture is the process of finding better ways to live. Ingenuity is the corner stone.  

With the resurgence of sustainable living, there seems, to me, to be too much information out there. There are certificate courses available if you are so inclined, but personally I have a more casual outlook on permaculture itself. How do we start the transition to sustainable living? What are some of the things I, as an individual, can do with limited resources? Let’s jump into a few ideas that will reduce negative input and/or create positive output, preferably, both. Once you embark on the road to sustainability, your life will become your project. More than that though, “You” become the project. After all, you are the most important member of the system you live in. You can have a good impact, simply by moving away from conventional ideas. 

Make use of old technology with modern materials 

A hay box can save you a lot of propane. In the days of yore, a wooden box was half filled with straw, then a boiling pot of food placed on that and then the whole mess was covered in more straw. The insulating properties of the straw are used to extend the cooking time without more input. In Chile, we made one using spray foam. I got the pot boiling, filled it with meat and veggies and put it in the box before I went to sleep. Not only was everything cooked, there was no need to worry about burning and it was still too hot to eat the next morning. My wife had used this same idea when we were backpacking. She would boil water, add rice and then wrap the pot in a towel and place it in a sleeping bag.  

Thermal mass. Collect whatever heat possible for use later. Stone mantels do more than look nice. They collect heat and slowly release it. A concrete slab in the sun can warm a room long into the night. Water can be used to store heat energy. The sun can heat water and insulated storage can minimize the heat loss. In Peru’s famous Sacred Valley this idea is used on a large scale for agriculture. The terraces are built in a way to minimize frost damage and conserve water. On a scale we can use, water can be heated during the day and used to heat greenhouses or homes at night. The possibilities are endless. Find things that will work for your situation, modify them, improve them, share them. 

Permaculture- Resource Management

Intro to permaculture

Everyone has heard the term “Permaculture.” But what is it? The short answer is that it is the utilization of local resources to benefit the local community. Semantics aside, it’s the philosophy of making do with what you have on hand. When there is a surplus, it is redistributed for the greatest benefit to the land and people. Everything has connections that can be utilized. For me permaculture is the process of finding better ways to live. Ingenuity is the corner stone.  

With the resurgence of sustainable living, there seems, to me, to be too much information out there. There are certificate courses available if you are so inclined, but personally I have a more casual outlook on permaculture itself. How do we start the transition to sustainable living? What are some of the things I, as an individual, can do with limited resources? Let’s jump into a few ideas that will reduce negative input and/or create positive output, preferably, both. Once you embark on the road to sustainability, your life will become your project. More than that though, “You” become the project. After all, you are the most important member of the system you live in. You can have a good impact, simply by moving away from conventional ideas. 

Resource management 

The first things that can be done around the house are simple. Use less of everything, reuse anything you can and some things may be eliminated entirely. I am not preaching austerity or some hardline ways to do things. I am sharing something I believe to be… simply a better way to live. Everything should be used to benefit the whole system. It is hard to talk about one thing in permaculture without all the rest. That is the main idea, everything is connected. As our environments get healthier, we do too. More than that though, it is an amazing feeling to see little changes starting chains of events for a positive effect. As we start living within the system, this becomes obvious. As the designers of these systems, everything starts at home, working its way out of the system.  

First things first. Use less energy. As we learn to reduce our consumption, it becomes easier to generate the energy on site, and more affordable. Reducing the size of the home, reduces the energy needed to power it. Using reclaimed material, lessens the impact of construction. With modern technology, efficiency not only becomes easier, it just makes sense. 

More and more people are downsizing. They are realizing they aren’t finding contentment in the standard model. There will always be the Jones’ striving toward unattainable goals. Then there is Us. The people who believe life should be simpler. Cookie-cutter McMansions are just too cumbersome. Old homes, while they have more character and are generally better built, eventually need to be rebuilt, remodeled and updated, are less insulated and more drafty Plus, you still have all the normal problems that come with owning a home. Living in a small space requires less of everything. Think about it. Less paint, less roof, less energy, less furniture, the list goes on and on. When you save money on these things, you can reallocate those resources to projects that make your life more meaningful.  

Finding ways to reuse material may seem a bit hokie, but they add instant history to new construction. While you may not want to use old windows in your home, especially if you live in an extreme environment, they can be used for mudrooms and porches, greenhouses and cold boxes and as wind walls, where we don’t want to obstruct the view. My favorite things to reuse are fixtures and cabinetry. Old wood can be used for shelving, planters, benches and more. I was at someone’s house and they had this shelf thing they had made while they were camping. The entire thing was built with stuff from an old collapsed shed. It was ugly, but we talked and laughed about it, spawning stories about ugly furniture for hours.  

I have lived off the grid, down a trail and up a mountain. Everything that was needed had to be hauled in. Gas for the generators and propane for cooking were essential. Since I wanted to conserve these resources, I reused them. Not literally, but none the less, I used every bit I could. I charged batteries any time the generator was on. I baked for days instead of meals. I did anything that needed power every time it was on. It makes sense to only pre-heat the oven once and make sure it is as full as possible. Shorter showers or better yet, don’t shower alone. Wood stoves can be used outside the home and still heat the house and water. Sunrooms use the sun to collect heat. Trees provide shade and material for composting, not to mention food for creatures. Grey water can be used to cool a slab and the same lines that heat the house can be used to cool it.  

Finishing Touches, a Fun Penny Floor

Looking for a fun way to finish your floor?  Why not upcycle all those pennies you have into a cool copper floor?  Today we will show you how we did this for a popular tiny house!

Yellow and green tiny house
The house from “Tiny House Hunters” with the penny bathroom floor

Over the years, we’ve been lucky enough to have multiple Tiny SMART Houses featured on HGTV’s Tiny House Hunters. In June 2015, we were able to showcase a special project that incorporated a lot of fun customizations. Viewers told us their most popular one is the penny floor. Would you like to do this yourself? Here are a few tips from our experience.

close up of the penny bathroom floor
Don’t all those pennies look so shiny? Such a great copper accent!

Prep the floor

First, you’ll want to make sure you have a clean and level area. Any little bump will push up your pennies and cause unwanted blemishes. You can use a tile mud to level the floor if you don’t have a smooth surface to start.

Prep the pennies

Once you have achieved a level surface, make sure it’s a dark color to really make those pennies stand out. We recommend buying a tarnish remover and soaking the pennies prior to letting them dry. This will take you a while and you’ll need more pennies than you probably thought possible. Make sure to leave enough time and bring extra materials just in case. The shine will be worth it in the end!

PLACE THE PENNIES

Next we used a spray adhesive, started in the furthest corner and worked down in rows. This may take some practice at first. Thankfully, these adhesives have a forgiving nature so that you can shift the pennies into neat rows as needed. Make sure any portion that you have already laid is covered prior to starting the next row of adhesive spray.

view from above of penny bathroom floor

MAKe them a floor

Once the floor is completely covered, make sure that the surface is wiped down and no debris remains. If everything looks the way you desire then it’s time to float a thick layer of marine grade self leveling epoxy.

Do not step on it until you have followed the directions on the epoxy and the resin is completely cured. 

Then voila! You have a beautiful finished product that brings out all the other copper accents of your tiny house.

More Details from this creative house

metal shower stall with copper pipes

view of "Steampunk" tiny house from the loft

copper trim on the bedroom loft

inside of the "Steampunk" tiny house

We’re pleased to bring you this guest blog by our finish and trim expert, Shana Hirst.

2nd Annual Highway to Health: After the Ride

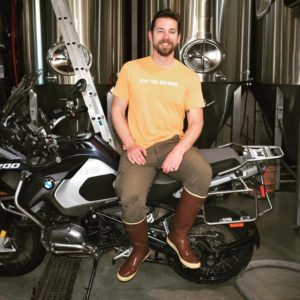
It’s our pleasure to bring you this guest blog by Flat Tail Brewery owner and Highway to Health organizer, David Marliave.

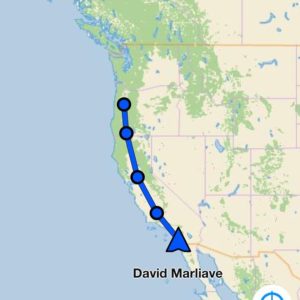
         When most people think of a motorcycle ride, they think of an afternoon jaunt through some hilly back country…Maybe a Sunday afternoon spent cruising through wide open farmland, or an early morning trip out to the coast and back. Most though, wouldn’t consider a 1,009 mile epic down I-5, crossing the majority of one state and the entirety of another with barely a curve from start to finish. Good thing I’m not most people.

dirt bike on dirt road

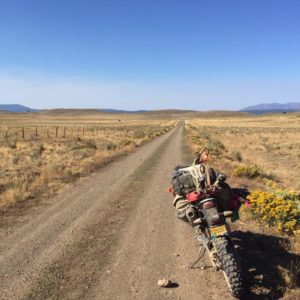
         I’ve been riding motorcycles since my 18th birthday, and while I manage to incorporate my passion for riding with nearly every aspect of my life, it didn’t immediately occur to me to link my interest in starting a charitable campaign with my love of all things “two-wheeled.” During the summer of 2016, however, the beginnings of a project began to take shape. All I had was the “why,” but at the time the “what, who, when, where, and how” seemed like minor inconveniences at most.  I wanted to raise money for something worthwhile, and I wanted to ride my bike to accomplish that.  Everything else was ancillary.

         Meanwhile, our California market had me riding between Corvallis and San Diego fairly regularly for business events, and after a few trips I thought to myself, “Could I do this ride in a day…?”.  So on a remarkably favorable November 14th, I rode from Corvallis, OR to San Diego, CA in 16.5 hours. It hurt… a lot. More importantly though, it made me realize I was capable of doing something most folks wouldn’t ever dream of attempting on a bike. I was stoked, to say the least.  I was also filled with a newfound thirst for endurance touring. How far could I go?

         A few days later back at the bar, I was chatting with one of our many regulars and sharing this new fire for long distance touring. That’s when it happened.

“Why don’t you turn this crazy ride of yours into a charity?”
“Well…Why DON’T I?!”

         Convincing donors to fork over their hard earned cash is hard, and an afternoon joy ride isn’t going to earn the big bucks. However, proposing a motorcycle marathon (or as its officially known, an “Iron Butt” – real thing, I swear) might just do it.

         So there I had it: the “how.”  Now, I needed the “who.”  Enter Angelo DeIso, long time friend of mine and fan of craft brewing. Angelo founded the BrewPublic blog years ago, and as I knew I would need a media partner, I reached out to see if he was interested.  Turns out, he was.  Angelo asked who I planned on raising money for, and while I had thrown a few ideas around, nothing had really grabbed me yet.

         A few years prior to the start of the Highway to Health, Angelo was diagnosed with a Glioblastoma brain tumor.  Since being diagnosed, he has become a champion for brain tumor research and awareness.  Angelo was keen on making my prodigal fundraiser a National Brain Tumor Society event, and it seemed like the perfect fit to me.

         So there it was. I had all of the proverbial stepping stones in place for a successful fundraiser. All that was left was… well, sitting at the bar and making phone calls, pretty much. It’s amazing what you can do when you just decide to do it.  The Highway to Health fundraiser raised $8,300 in its first year, all of which was procured via phone call or email to friends and associates in the brewing and motorcycling industry. There was no fundraising team, no phone bank, no marketing budget. Just a guy sitting at the bar, pint in hand, making some phone calls.

         Fast forward to year two. I had plans to make this year bigger and better than the first in every way possible. Life, unfortunately, had other plans. When our Northern Oregon distribution partner decided to sell out to the largest distributor on the west coast, my life became significantly less relaxed. Suddenly I was plunged into a day in day out battle for my own distribution rights, and focusing on a fundraiser while trying to stay in business was more than a bit inconvenient.  Thankfully though, I was able to fall back and count on the community to pick up the slack.

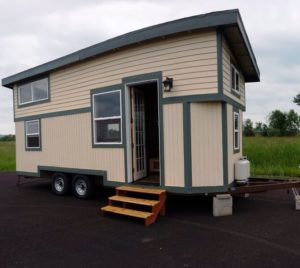
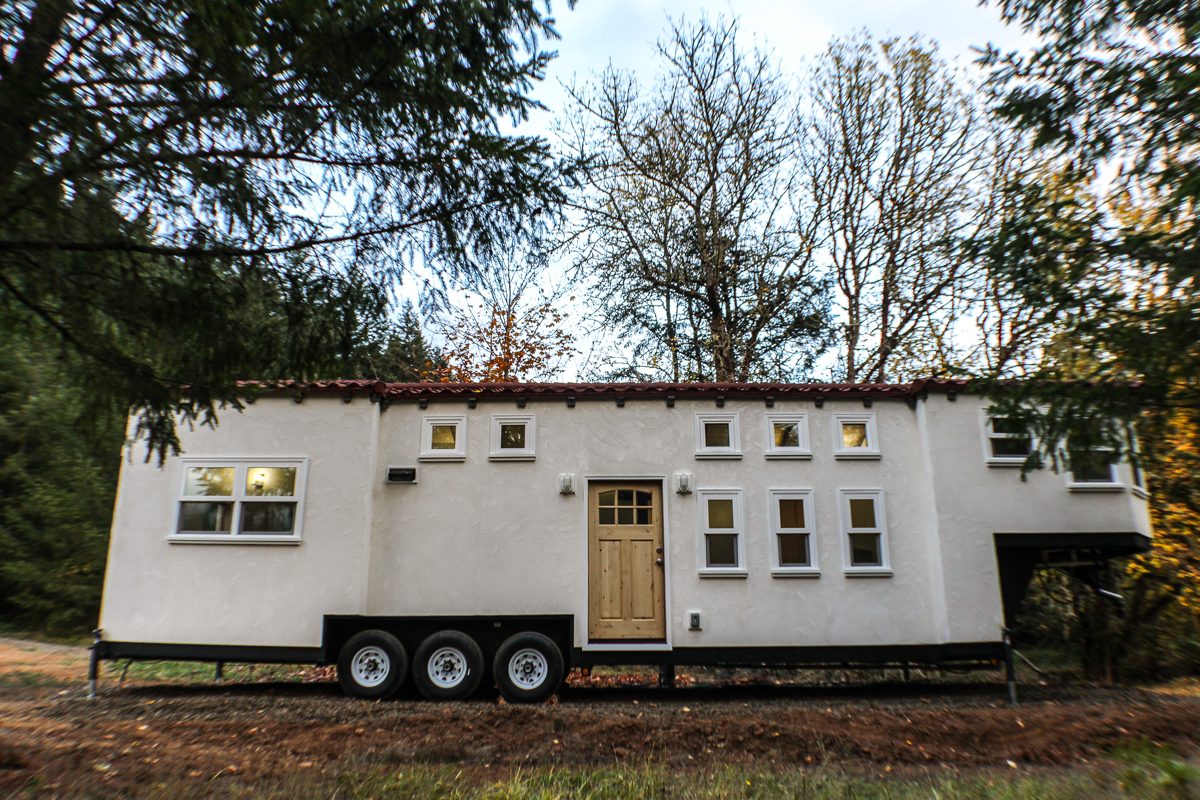
         The number of people that simply overheard me talking about my project at the bar or on social media and ended up donating was unbelievable. Nathan and Shana of Tiny SMART House were two of those people.  Flat Tail is often referred to as the Tiny SMART House satellite office.  Shana and Nathan are big fans of our sour beer (and scotch) and the dart room may as well be referred to as “their office away from their office.” When I mentioned my fundraiser to Shana, she lit up and immediately started thinking about how they could help make the project even better than it already was. Cash is great when it comes to fundraisers, but what was even more valuable than there insanely generous $500 donation, was their willingness – neigh, exuberance – to help spread the word and become true partners in this project.

         While this year’s unexpected ups and downs may have gotten in the way of realizing the Highway’s fullest potential, thanks to our incredible donor partners, we still managed to knock it out of the park and raise over $10,000 for the NBTS in year two.  What’s even more important though is the foundation and framework that has been built for upcoming years.  For the first time I feel like I’m part of a team and not just some guy with a back yard charity.  That realization brought me a lot of clarity and confidence on this years ride, but more than that, it made me excited and hopeful for the next.

Monterey Villa, part 4: A Spanish Roof & Stucco!

Monterey Villa gooseneck tiny house with palm trees in background

Kurt and I both had experience building Spanish architecture in traditional size houses. Our puzzle with this house was to fit exposed beams, insulation and loft headroom into a 13’6” tall structure. Additionally I had the crazy awesome idea of using the gooseneck portion of the home for the bathroom. This meant that we needed to fit a shower tall enough for our clients (and the average guest) under the most intricate part of the beam work. 

My vision was 3 separate roof sections and a staggered facade to give the house a traditional feeling and bigger presence from the broad side of the house. I wanted the loft beams and rafters to poke through the walls and hold up what would look like a clay tile roof. I really wanted this home to feel like it was 100 years old and built to last the next 100 years. Finding the right materials to achieve this while being lightweight and road safe was the next step.

Our junior designer Bri, lead designer Shelby and I started hunting for materials. We literally had the words “Find a roof and exterior finish” written on our design office boards for months. Every product or material we found had to be ordered, examined and tested for durability and ease of installation. We had samples, brochures and mock ups trailing from the design office to the shop and back.

Bri finally found the wining roof material from Stile, and Shana who leads our finish shop found flexible stucco!


We decided the rafters and beams couldn’t really poke through the walls on a movable house but we could still get that look. Normally I’m not a big fan of “faux” architecture as such but Kurt and I both felt the exterior corbels under the roofline were a big design element that gave contrast to the white walls and added to the Spanish feeling. 

The interior finishes, fixtures and equipment (FFE) was the next step in the design process. We started with the biggest pieces like the SMEG retro vintage fridge, a key design element from the beginning. The aesthetic was perfect for the look and era and the small size fit the scale of the home.

The clients shared many inspirational photos of interiors and almost all had exposed aged and distressed wood beams. Shana developed an “Ebonizing wash” for the beams that used vinegar, steel wool and black tea to age and “burn” the raw wood. The effect was stunning as various shades of grey emerged across the natural wood grain. Each piece of wood is unique and really feels special. My favorite spot is the finger joint on the P-lam ridge beam in the center of the home. There is something about the juxtaposition of the modern engineering with an aged finish that makes me smile. Our clients are an engineer and an artist and that one spot in the heart of their home where modern engineering meets old world beauty makes me think of them.

Monterey Villa side view outside

Guest blog by Jennifer Richmond, Tiny SMART House business development manager,
experienced designer and tiny house expert